
Adventures in CR-200B Firmware Flashing
A few weekends back I had the pleasure of discovering that a NTFS-formatted SD card could brick my trusty CR-200B printer from Creality. An otherwise reliable piece of hardware, it was now stuck in a perpetual boot state.
After a bit of poking around on Reddit, I came to the conclusion that I simply needed to re-flash the firmware, but that wasn’t quite the whole story. Below is a run-down of the steps I ultimately used, along with some hopefully helpful diagrams of the process.
Getting Started
You will need the following to fully flash your printer:
Phillips-head screwdriver
Micro-SD Card
SD Card (or an adapter for the Micro-SD card)
Suitable Firmware Image File
A brief note on the firmware file
If you’re updating your firmware because of an issue like mine, you may want to first try some of the older firmware versions. For whatever reason, when I tried the latest version it did not work. I had to pull a version from February of 2021 to fix my issues.
Formatting the SD Card
The first step in this process is formatting your SD card. This can be done with various utilities but below are 2 methods for Mac & Windows.
Mac
Insert your SD card
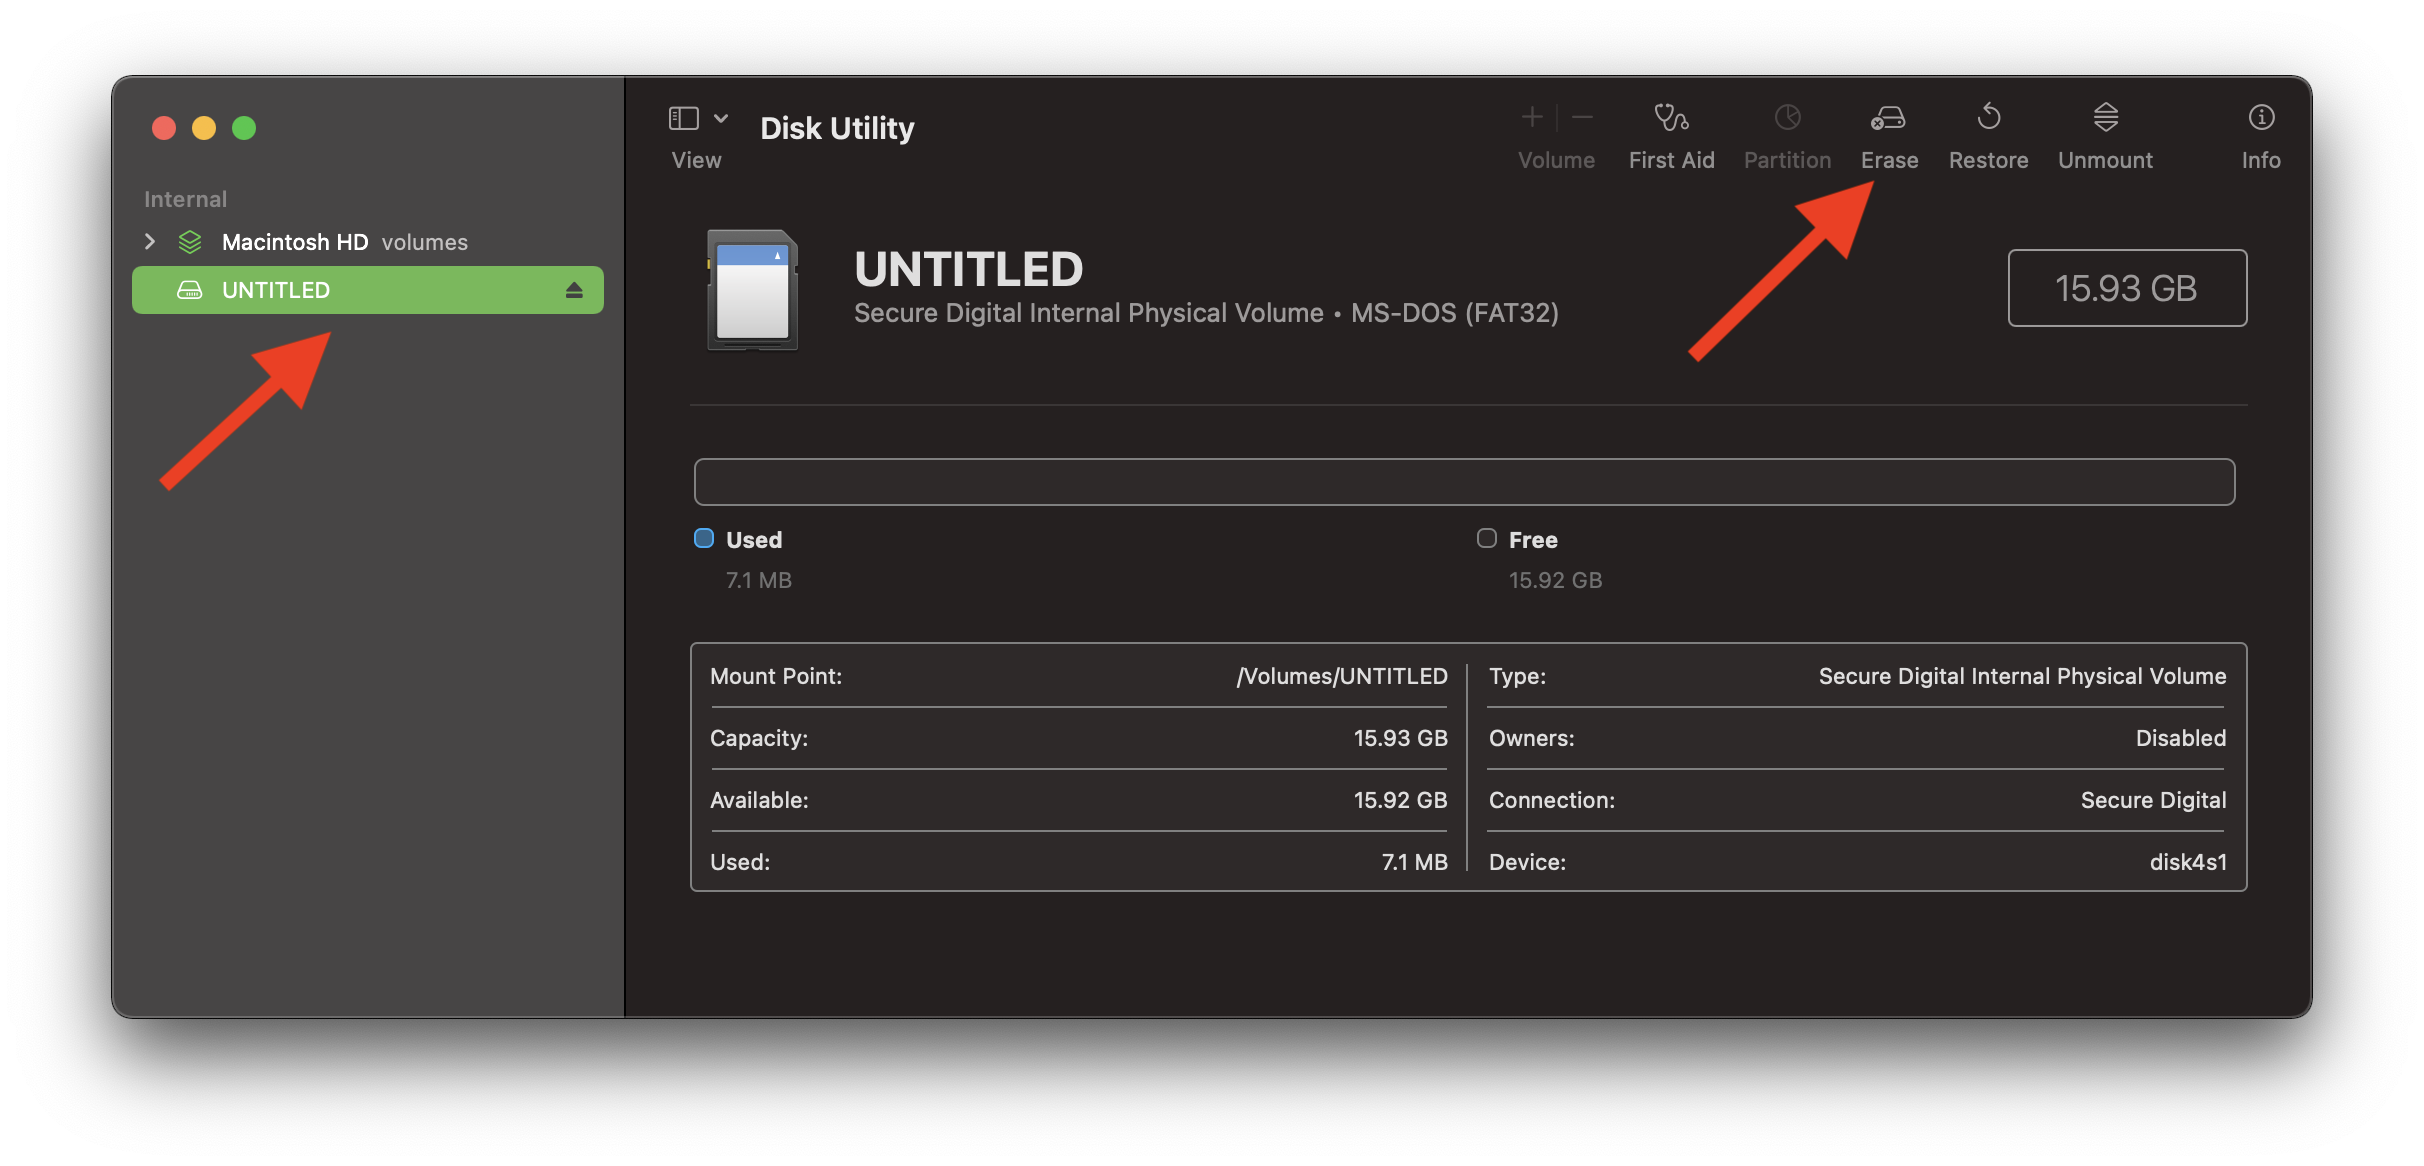
Open “Disk Utility” (You can use spotlight search to find it quickly)
Select your SD card from the pane on the left of the window and click the “Erase” button
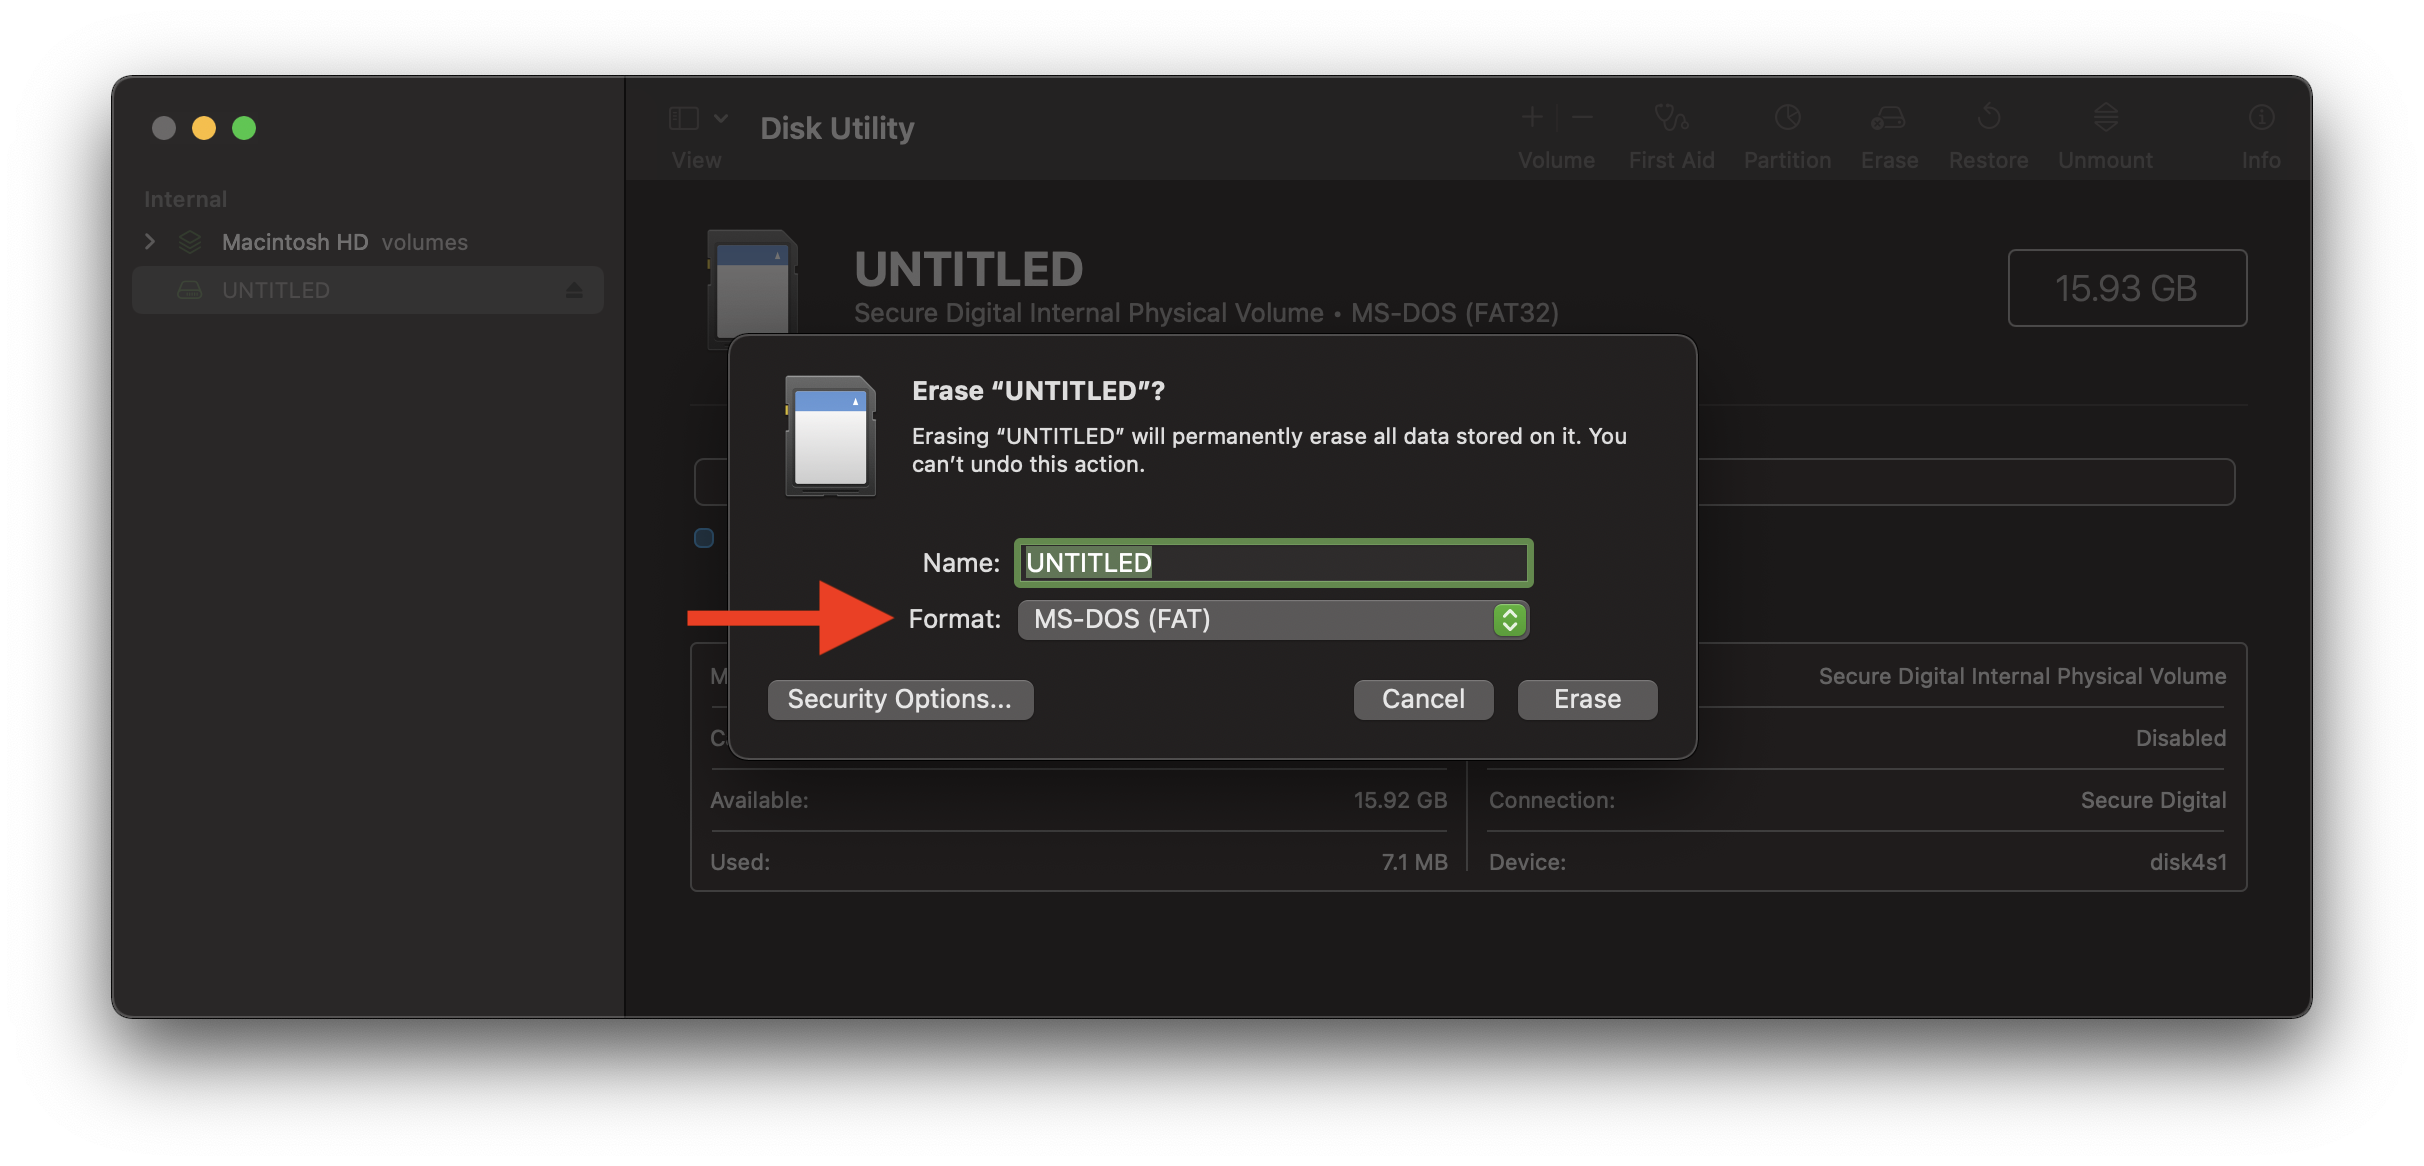
The name does not matter, but ensure that the format selected is “MS-DOS (FAT)”
Windows
Open File Explorer
In the left-pane, right click on your SD card and select “Format”
Ensure that the file system is FAT32
Click “Format”
2. Flash the motherboard
In the firmware archive that you download, there should be 2 or 3 folders. Find the one called “Mainboard firmware” or something similar. Inside it will be a .bin file. Copy this over to the SD card and ensure there are no other files or folders on the flash drive. The bin file should be the only thing on the card.
Once the file is copied over, eject the SD card and prepare your 3D printer by turning it off with the switch. Then insert the SD card and power on the printer. The Creality loading screen should come up and pause for a few seconds and then the progress bar should fill. After around 30 seconds, you should be back at the main menu.
You have now successfully flashed your motherboard firmware. Next you may have to flash the front-screen firmware.
3. Flash the front screen
Turn of the printer if you haven’t done so already. Next, gently lay it down on its back. You should see a metal panel with ventilation holes on the bottom. Unscrew the 2 Phillips head screws and gently remove the panel. Be gentle during this process as there is a fan on the panel that is plugged into the motherboard. You can unplug this fan from the motherboard.
Next, look inside the enclosure toward the front of the printer. In addition to the mainboard, you should see a second circuit board behind the screen. This board will have a micro-SD card slot.
Take a micro-SD card and format it as shown above. Next, go back to the firmware archive and find the next folder called “screen firmware” or something similar. Inside this folder will be another folder called “DWIN_SET” or something of that nature. Copy the entire folder to the SD card. There should now be a single folder on the SD card and no other files.
Load the SD card into the micro-SD card slot on the screen circuit board and turn your printer on. Text will scroll on the screen showing the number of files copied over. Wait until “END!” appears in the second or 3rd line of text and then turn the printer back off and remove the SD card.
4. Re-Assemble the printer
Finally, re-assemble your printer by plugging the mainboard fan back in and screwing the bottom panel back on. Set the printer back upright before turning it back on.
Note that you may want to re-level your bed after these steps, but you should now have a fully flashed 3D printer. As noted above, the Creality firmware can be a bit buggy, so you may have to try a few different firmware versions before finding one that works.